Showing posts with label 4. Show all posts

Wednesday, June 1, 2016

Quick Fair is amazing!

HOLY BALLS its been a long time since my last update.  Work has been eating me alive, folks, eating me alive.  Im actually home now for more than one day, so I can update this blog, and work on the boat, but in the reverse order because the boat comes first.

Several weeks ago I ordered some Quick Fair from the fine folks at Duckworks.  This stuff is A-M-A-Z-I-N-G.  Its well worth the money.  It mixes easily, quickly, with little fuss.  It applies itself with astonishing ease, especially using a plastic spreader.  It dries quickly.  It sands easily.  I made several corrections over time as I got used to the stuff and ended up with a chine that is-- wait for it-- very fair.  It filled in the little weave bumps left over from the fiberglass tape, it nestled into the ridge between the tape and the hull that hadnt been filled with epoxy, it filled in some holes, and it faired out the gap between the hull and the stem-dowel-thingie.

I am in love with Quick Fair.  To boot, it even looks like chocolate pudding, except if you ate it, you would die.  The smell tips you off to this.  It smells, bad.  I used my respirator.

I also bought a little digital scale for twenty bucks at the local pharmacy.  Its a "The Biggest Loser" scale, named after the TV show, I believe, I wouldnt know because Ive never seen it in my life, but the box talked about it.  This made mixing the Quick Fair in the appropriate manner mucho-easier, because frankly, theres no way to tell how much you have.  It doesnt pour into a graduated cylinder or anything like that.  I am also using this little scale with my epoxy, and it cuts down on waste.  Another "shouldve thought of this a while ago..." moment.


Heres my chine, needing some serious fairing, including little holes in the fiberglass tape that sanded out because there was air trapped underneath and Hand of God seriously pissed:


And bingo!  Quick Fair to the rescue!


Heres a progression of working around the stem.  Slop it on, spread it out, sand it, touch up, presto!


Oh boy!

For all your fairing needs, Quick Fair is the way to go.

I watched this video for some very good tips.

Sunday, May 29, 2016

Rudder stock design 4 Mast gluing

In yet another installment of "I try to re-design the rudder stock" I have received yet another set of plans from a Goat Island Skiff builder in New York.  He has graciously supplied me with these two schematics of his own design, as a solution to removing the tiller from the rudder assembly without having to take the rudder off the transom.  It is self-explanatory:


I really like this design, it is better than mine for two reasons:  1. It maintains Mr. Storers rudder stock design and hopefully solves the structural issue that he was concerned about, 2. There is less time fiddling over the transom pulling very critical pins over water of yet-to-be-determined depth, if you get my drift.  I can remove the tiller from the safety of the cabin.  Unfortunately, I will still have a stub of tiller sticking into my domain, but I think, for now, this is the idea Im going to go with.  The great thing about the rudder stock is that it is simple and easy to construct, I can always make another.

In other news, the mast was glued in its first step today.  In the previous post, I shaped the narrow staves.  This was a workout, but I worked carefully, and Im happy with the result.  Then, off to make the spacers for the ladder frame.  I used a piece of fir that was lounging around the garage, some stud material.  I used some good parts, and cut them to fit.  The base plug meant a trip to Lowes.  This is the first wood part of the boat that was not bought at either of my two local lumber stores.  Sorry guys.  Anyway, an 8 piece of 4x4 cedar.  I thought about using fir, for a few bucks less, but I went with the rot-resistant cedar.  Its an important piece, its light, and it should be good.  The other spacers Ill goo up with epoxy and make them plastic.


Well, that was interesting how the photos lined up, but I like it!  Notice the base plug.  After a quick mock-up my lovely wife and I took one of the uncut stave stock pieces and brought it into the basement, where I can get an even floor workspace and a slightly higher temperature, better for quicker gluing.  We made sure that we could get the wood in and out of the basement two different ways, so I dont build the mast and then get it out.  I am positive I can get the mast out of the basement.

Layed out ready for the dry fit:


Sweet, I did it again, but I dont know how.  The mast is quite straight, but I decided to use one of the wide uncut staves as a backbone for gluing, that way I could ensure that the mast is straight with no wobbles.  It also gives me a good even workspace for gluing too.  I covered one stave with packing tape, and glued away:  Notice too, the hardwood runners that will be glued to the bottom of the hull, they are long ones and needed to be scarfed.


It went well.  The bricks are slightly nudging the mast into a straight position.  Youll also notice that you dont see much of the wide stave underneath this glue-up, thats because the tolerances are super tight.  I overcut my narrow staves by 1mm and it pretty much ate up all the space on the wide stave.  I briefly considered re-planing the staves, re-working the spacers, and then gluing, but my lovely wife stopped me with some business graduate degree mumbo-jumbo stuff and talked me out of it.  I might have to plane a little extra off the base to get it to fit in the mast step, and I can (with difficulty) enlarge the mast step as well if need be.

Tomorrow, gluing the wide staves and completing the box.
 

My big day

Today was quite the day. Im over my cold, as in, I dont feel like super-crap anymore, but my head and chest are still congested to hell and back. However, since Im slowly on the up and up, off to the basement for a little R+R.

Last night I realized that I had beveled the bottom of BH1 in the wrong direction. Today I fixed this by re-beveling it flat, and just leaving it as such until later. If I have to bevel it in the correct direction, so be it. Its only 2mm so its not too tricky.

Second, I found this:

Delamination in the ply on my Starboard bow, inboard. Approximately 4"x6" or so. Nothing on the "mated" side, the Port stern, so Im assuming it is only this piece that has the problem. I sounded it out with a pencil, and Ive got a good idea of its shape. I poured straight epoxy into the hole, then squashed it with bricks.

Third, I discovered this:


Thats my finger pointing at where the bow SHOULD be. OOPS. Im slowly coming along with the dreaded stem, and I went to match the stem to the bow and it came up a couple of cm short. Either my stem was wrong or my bow was wrong. I busted out the lofting map for the sides and for some damn reason, I measured 55mm from the end of the ply to the point of the bow rather than 55mm from the last 300mm mark. Damn, bro, good catch! So I re-marked the bow and cut them anew on both sides. The stem fits perfectly now, with room to spare for the bow knee.

Then, I got gutsy and ripped two of my cedar planks and and scarfed them for the chinelogs:

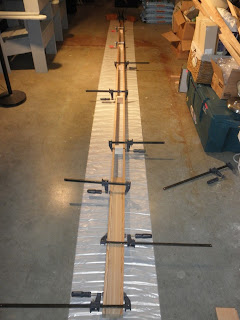
This is my scarf. Some of you are really going to hate this, but I eyeballed it on the table saw, and then planed them to match. Not perfect, but close enough for this amateur! I used a 1:6 ratio, so that would be 1 1/2" : 9".

THEN, I cut out the buttstraps and glued my scarfed chinelogs and my side together!


Here we are now in the garage. The buttstrap gluing kinda blew, I was by myself and I rushed it. I was sure I put on enough glue, but very little actually oozed out from underneath the straps. Im actually a little concerned I may not have put enough, but maybe I put just the right amount, I tend to go overboard with the glue. So well have to see about this.

Finally, I glued on a little piece of ply for backing on the transom for el rudder. Thats Spanish. That in itself was a mini-adventure, because the ply I chose for it initially starting sliding around after I glued it up on the old epoxy from the frame and the seat cleat. WOOPS. So I pulled it off quick, tore apart the garbage for an old jigsaw blade, and holding the jigsaw an inch above the ply ripped a small piece of one end so it could sit better between the frame and the cleat. Of course I got wood dust all over the backing, and I scraped it off, threw on some thickened epoxy, and called it good. I thought this would have been a simple operation, so I didnt wear gloves and holey moley my hands got sticky.

On a blog-related note, I am deleting the timing scoreboard from the blog. Its beginning to get inaccurate and more difficult to keep up with. Today I did a million things and Im not keen on attempting to figure out what was what. So maybe from now on just a tally total.

Friday, May 20, 2016

Rudder design 4 daggerboard glassing

After many trips to the hardware store getting stainless steel carriage bolts and machine screws that were often the wrong size, I finally got my rudder box together in some sort of usable fashion.  As my intrepid readers may remember in three other previous posts (search in the month of March), I have been trying to figure something out in order to get my tiller to be detachable.  I went with the final option, illustrated in this post. 

The rudder box is glued up but not glued together.


As you can see, I am wearing my camo Converse sneakers.  Very cool.  The original tiller design calls for the tiller to be permanently attached to the top of the box, where my shortened tiller stock is now-- so originally that would be much longer, but permanent.  This way, I can remove the tiller and leave the rudder in the water, freeing up open space in the boat during quiet times.  I used a carriage bolt with a butterfly nut tensioned by a split washer.  Dont drop it, and carry a spare! 

The spacer is as of now temporary, but I could do one of three things.  I could lengthen the spacer to make it full-tiller length, giving the tiller laminate strength; I could shorten the spacer; I could make two evenly spaced spacers, I could leave it the way it is.  This is yet to be determined.  Heres a closeup for the interested:


Im having some serious problems with my hardware for the rudder, unfortunately.  I wanted a pintle and gudgeon style assembly, but my 1.5" gudgeons are not fitting around my rudder box, even though its 1.5" wide.  Something aint right.  Also, Id have to expand my tiller access hole in the transom to accommodate the up and down motion to get the rudder in and and out.  So Im scraping the pintle/gudgeon idea and Im going to go with the gudgeon/gudgeon idea, as the original plans stipulate.  Which means I have to find some sort of long pin to thread between all of them.  Boo to that. 

Also today Ive been working on my blades.  My rudder got sanded down to the matte finish, and I carefully taped off vertical areas that would run, and applied one last thin coat of epoxy onto one side of the rudder.  Tomorrow, the other side.  I used a plastic spreader, and it went very well, very smooth, and Im very happy with my luscious result:


Youll notice on the left hand side that the leading edge still isnt coated, this was taped off earlier.

Then, off to glassing my daggerboard!  Much like the same for the rudder, except I cut a bigger piece.  I had a lot of runs in my rudder, and I figured this time I would lay the board flat, spread epoxy with a squeegee, and then turn it over, do the other side, and then hang it up. 

So I went ahead and did one side horizontally:


 I thought I was being pretty smart. 

So then I turned it over and did the other side.  Something caught my attention and I looked underneath my board and...

... well I didnt take any pictures because needless to say the whole first side has very neatly peeled away from the board, thanks to Mr. Theory-of-Gravity.  Gravity is only a theory by the way, they should teach both sides in schools so kids know this, because there is lots of evidence that gravity does not exist, but "they" dont want to show you it.  I digress.  Today, gravity was obviously working quite well.  I finished the job at hand, and then hung it up, and re-spread the cloth down.  Fortunately not much damage done, but for my smartness, well, not so smart now.  Here it is all hung up to dry:


Its late, Im still periodically coating the board to get the weave filled, and Im tired.  I timed this one bad.

Thanks for reading!

Wednesday, May 18, 2016

New post!

With nothing in it!

Work on the Goat Island Skiff has been temporarily stopped due to a return to work/on the road status.

I have pictures of some work I did just before I left, but they are unfortunately inaccessible at this point in time.  Stay tuned until next week!

Saturday, May 14, 2016

TWO HEARTED and IAZ P

This is going to be a brief post, but it is very important that I prequel the upcoming week with exciting new developments here at Amateur Style!

Goat Island Skiff I Am Zinea, Pterodactylus now has a fellow partner in somewhat-high-seas shenanigans!  I present Capn Jons meticulous and spectacular Two Hearted, a Ross Lillistone Pheonix III.

HUZZAH!


HUZZAH!

Two Legends and Capn Jon-- cool guy who doesnt look at explosions
HUZZAH I say!


Thursday, May 12, 2016

A note on tools

A few things on tools that I have found out the past few days.

A japanese pull saw is awesome. I doubted it at first, hemming and hawing for months before getting a small one-sides saw. A FANTASTIC PURCHASE. Versatile, sharp, easy to use, and precise. Practice first, because youll saw through something important quickly and without realizing it (trust me).

My random orbital sander was a $9.95 DEATH DISASTER I purchased at cheap-tool-emporium Harbor Freight. Its so frustrating to use I want to throw it at the cement wall. I will have to go buy a better one that actually secures the sandpaper.

Most importantly, I was perusing my jigsaw blades and saw something called a "scrolling blade." It was small and skinny. "Hmmmm, I betcha this is for going around corners a little tighter than the normal blades!" Hmmmm, I reckon I was correct... and this was after I cut the hole through the transom, BH2 and BH3. Boo me, for not knowing my tools. Again, amateur style is my building style.

Monday, May 2, 2016

Transom glued up!

Ok. Ive been off the radar for a few weeks for several reasons. Namely: Job related problems now solved, my marriage, my inadvertent cutting-off-the-tip-of-my-finger winterizing my garden which led to a giant bandage and stitches, and my work that takes me on the road. Im suposed to be on the road today, but Im not because I have a massive head cold and I think my eyeballs are going to pop out of my head. So no work for me.

About two weeks ago, I glued up the transom. Storer recommends not using screws in the transom, I think this is for aesthetic reasons. I did use screws as opposed to the nails I had been using for the BHs, primarily because I could get a slightly tighter fit. I did not use nails on the transom head-board because I wanted to maintain the visual integrity of that piece, and I was able to secure it in spot with clamps through the tiller-hole. Everything came together really nice and I am pleased with the result. I was careful to wipe away the excess, and I was sure I had gotten everything, but I didnt. I came back and found hardened drips that materialized sometime during the night and they dripped onto the stern-stern of the transom. Using a chisel to cut them off, I ended up mucho-biting into the top of the transom and took a chunk out of the ply. OH WELL. I saved the piece and will epoxy it back in.

Otherwise, I think the transom looks good!

Epoxy coating the interior and more turtles

Today I took advantage of some free time and some of the most glorious weather you can imagine in beautiful New England this time of year!

Drum roll please.......

I epoxy coated the interior of my Goat Island Skiff! Yeah!

This is big for two reasons:  One, I wasnt looking forward to it, Two, my back has been in such a state that I havent physically been able to do it.  Being able to reach down in there and coat up the inside was a real good feeling, lemme tell you!  I was stoked.  Again, physical therapy = awesome.

So, coating the interior is much like the exterior.  It came out very neat, too.  I am pleased with the result.  Heres a romantic picture of her in the sunset, just her and me:


 She looks good.  So far, Ive done two coats of epoxy.  Im supposed to do three, which I did on the exterior, but I feel like two is good enough especially since its not going to be saturated in water.  Not to mention its going to be covered in two coats of primer and two coats of paint.  I should be ok.  Maybe I will do three layers on the bottom and chinelogs...

That all being said, I want to point out again how she can ride on her side when turning her over:


This is HUGE.  To those who have extensive dinghy experience, you all know exactly what Im talking about:  Turn the boat over, get it on a side, attempt to balance it on the gunwale, fail, catch the boat, wrestle around one of the ends in an attempt to get to the other side, fail, watch boat fall to ground in a random direction, wince at possible damage, etc etc etc.  It sucks.  This baby, she rests on her side.  You can walk away.  Drink a beer.  Pick your nose.  Go on vacation.  She will sit, on her side, patiently.  Awesome.

Finally, I caught a Painted Turtle today.  This is a quite common turtle on the North American continent, and not as big or as long lived as the Blandings Turtle that I found a few days ago.  Whats neat about this one is that Ive been trying to catch one for a year.  Now, that doesnt mean Im out everyday like its my job, but many attempts and sneaky approaches have been tried, to no avail.  Catching this guy, while swimming, is a minor coup for you know who.  Me.  Quite beautiful.  Hissed at me when I picked it out of the water.  I put it back where I found it, and I hope it forgives me.

A little grumpy.  

Thursday, April 28, 2016

Moving along

A bunch of small items were taken care of today despite my continued head cold and heavy congestion. Sneezing and coughing and snotting all over my boat was a great experience, really.

Anway, All the BHs are beveled, I notched the top frame on BH3 where the middle 90mm was supposed to have never been applied (room for centerboard case), and I cut and traced out the timber for the stem. I also cut the holes into the BH 2 and 3:


Theyre still rough, I havent sanded them smooth or even yet. You may notice I went for the trapezoidal shape on BH2, this was at first done because I was a little nervous doing circles with the jigsaw a la transom. After I did it, I thought, damn, that looks bad. But then I realized that without the curves I can stuff more equipment (picnic basket, wine, beer) in that forward space between BH1 and 2. So I liked that, but then I waffled back to cutting a bigger hole to get curves. At this point my wonderful wife wandered in as I sat perplexed, and she gushed at how imaginative I was for mixing and matching shapes for the holes and how great it looked.

The trapezoid stays, gentlemen.

Up next:

  • Shape and finish the dreaded stem
  • Cut timber and scarf chinelogs
  • Apply re-enforcement on transom for rudder
  • Cut notches on BHs for chinelogs
  • Coat all BHs with epoxy (I may do this later because Im getting impatient to see the boat)
  • Glue up the sides
  • Touch up with the plane
  • Screw it all together for a dry fit in the garage
  • Freak out as I try to find a warmer place than the garage to put it for the winter so I can work on it.

Tuesday, April 19, 2016

Gluing BH 4 and some things I found out about gluing

Alright, Im a little frustrated at myself right now, because things are coming along nice, but not coming along like I want them too. Everything will be OK in the end, but it wont be as nice and neat as I would like to see, and thats aggravating. A lot of the mess stems from excess epoxy squeezing out and making the seams look all lumpy and dumb. A faster clean-up job before anything even begins to think about setting up would have saved me from having stupid looking frames.

First, Ive been having some problems at work that are pretty significant, and I wasnt as focused on gluing as I wanted to be or could have and that led to sloppy gluing work.

Second, I just dont have wood gluing experience. My epoxy/fiberglass experience is solely focused on my Laser, hull #194, from the early 70s. This boat has hit submerged objects, sandbars, docks, buoys, other boats, etc. at speed. Laser speed. Fast. Rig humming with 2/3 of the boat out of the water fast. Once, it fell off my car... while I was driving. Needless to say, Id just slop some epoxy on and keep going. Now that Im gluing together my wood boat, I cant be as messy, or at least, Id rather I wasnt as messy.

BH1 is messy but will be hidden mostly from view. BH2 is somewhat in view and the frames are going to visible, and its kind of messy. BH 3 could have come out perfect, but it looks messy too because I rushed and didnt STOP.THINKFIRST.NOTSOFAST. BH 4 came out really nice and clean, but the frame is mostly hidden within the rear airtight box, so no one will see my clean job! Dammit! Roar!

So heres a tip to you beginners out there: First, read all you can about epoxy. I have yet to find a nice primer/tutorial on wood gluing for boats, and that would have helped. The Storer forum, my thread in particular could help you out. Second, my biggest mistake in neatness is that I waited for the epoxy to firm up to a putty and then tried to hack off the excess. This is a mistake. This evening I glued BH4 together, let it sit for a few minutes to excess epoxy oozed out, and just cleaned it right up. Presto besto pesto yum done. A nice neat job. Why I didnt think about this 3 BHs ago, I know not.

Monday, April 18, 2016

Little Chebeague and Fort Gorges

AHOY

Last week I was in need of escape to spend some time on the water.  With just a two days off I quickly loaded the boat and got myself back to the clear waters of Casco Bay for a short and dirty one-night jaunt.  First time the Goat Island Skiff has been in Casco Bay since 2010!  Initially I had planned on going out to my favorite little island, Bangs, scene of many an adventure in IAZ,P, but when I landed on the clear sandy beach of Little Chebeague I was hard pressed to find a reason to continue onwards.

Not only did the nice beach attract me to Little Chebeague, but I saw this little piece of awesome anchored.  Note clear water.

Sweet lines


This is an Atkins XLNC, white cedar on white oak frames.  Please check out the Atkin & Co. page for XLNC here.  You will notice that in the pictures, this boat if featured.  XLNC was also featured in the 2012 Small Boats by Wooden Boat Magazine.  She is powered by a Palmer Model #27 complete with required Pabst Blue Ribbon beer can on the exhaust manifold to prevent water from dripping into the carburator.  This is called Yankee ingenuity and if you are rolling your eyes you are not from New England.


The boat is currently under the care of Bill and Jennifer who were enjoying a week cruising the Maine coast from their summer retreat.  With a setting sun and a falling tide Bill and Jennifer shoved off for home.  For all of 100 yards the boat made cute chugging noises as its bow seamlessly split the water, and then some engine fiddling was required.  Engine fiddling is a very important part of maritime experiences.  If you are not fiddling with the engine, something is wrong.

"This beer can is a fine solution"
After Bill and Jennifer left I set up camp as the tide continued to drop, stranding IAZ,P for the night.  I was alone on the island, on a beach, watching the sun set and the ferries go by.


Im pretty sure this is the same ferry that almost ran me down during VisionQuest/ManQuest2010 at this very spot!
My evening was spent in quiet reflection as I enjoyed lheure bleue  some rice, carrots, and hummus, and a swig or two of rum.  There was no wind, just the gentle lapping of water on the beach and the kaleidoscope of stars and Milky Way spinning slowly overhead.

As I was snugged down in my sleeping bag an ugly plastic motorboat showed up  and disgorged several 20-something guys.  Their self-importance was reflected in their constant braying, bottle rockets, frenetic music selections, and general indulgence in noise which totally shattered any optimistic feelings I was having about the world and humanity.  We truly are a pathetic and primitive creature, afraid of the dark and the silence that accompanies it, always insistent to fill the few sacred times with the profanity of our repugnant self-worship.

The next morning I was awakened by a hot needle boring into my nose into my brain.  I swatted at my nose to find a red ant at the tip of it.  Wake-up calls from red ants biting my nose does not figure high on my pleasure list.  I couldnt stop the tears streaming from my left eye.  I was awake, before the dawn, but her rosy red fingers were already streaming over the coast of Maine.


I had a little bit of a breeze from the northwest.  Since it was supposed to shift to the south later in the day, I supposed a period of calm would fall between the two.  A high pressure dominated.  Even though the ebb had begun and I would be fighting all of western Casco Bay to get back to South Portland I decided to shove off and use the wind while I had it.

It turned into a frustrating sail with the current against me, I made barely sufficient headway.  Time to strategize.

Little Chebeague is (A).  Fort Gorges is (D).  Bug Light Park is southwest of the fort, and that is where my vehicle and trailer are.

Purple = wind
Red = nasty currents
Blue = heroic path of jaunty skiff (approx)

Leaving Little Chebeague I usually go west of Diamond Island (marked McKinley Estates) into the broads of Casco Bay.  However, the ebb was on, and the flow was pushing out to the Atlantic (east-southeast of the island group-- to the right on this map). This made getting around Diamond difficult, since the current is rather forceful around the northern tip.  With the wind from the west, I made a gamble, and decided to allow myself to get pulled into Hussey Sound (B).  My hunch was that I would get pushed towards Peaks Island.  The channel on the northwest side of Peaks would also have a strong flow against me, but I hypothesized the westerly wind would be compressed between the islands, like a venturi.  This would give me the thrust needed to overcome the current and get halfway down Peaks Island to (C), where the flow would be reversed in the other direction.

I sped through Hussey Sound (B) worked my way towards the gap between Diamond and Peaks and sure enough, the wind velocity was much higher!  I had a spirited sail through the gap, keeping to the southeast side where the current was least and the wind highest.  I made it to (C) and the current reversed and the wind died, but now at least I was being pushed to my destination.  I was elated!  My strategy worked.  On the backside of Peaks I broke out the oars to row towards Portland harbor and the breeze that awaited me there.

Mastermind
About this point a very nice couple in a powerboat swung by and asked if I was OK.  I affirmed I was. They asked if I wanted a tow.  I politely declined.  They asked again, as if I was a bit muddled-- I was rowing and I didnt have an engine after all-- and I declined once more.  They sped off and I rowed on.

I made landfall at Fort Gorges on the beach.


Fort Gorges is a pretty sweet place.  First, its a bad-ass fort.  Second, its publicly owned which means we, as citizens, can enjoy nice things together for enjoyable picnics and family outings.  Third, its a thumb in the eye our litigious society.  Its a fort.  There are dark places.  There are high places.  There is water!  In short, I love Fort Gorges.


Entry way.  Two massive doors.  Arrow slit windows to gun down the invaders.
Walking into the fort.
Entry way is on the left.  Powder Magazines are straight ahead, the giant wall in the shade

 I explored the officer quarters, which had nice plaster and blue paint on the walls, and then walked up to the third sod-covered roof level where bigger guns were to be placed.  This is a place to wear shoes FYI, there are lots of rusty bolts from the gun placements.  The dark areas and powder magazines are pitch black nighttime dark, so bring a flashlight if you want to go in them.  And bring a friend.  Spooky abounds.  This fort is massive by the way.  Everything about it screams indestructible.

I went up to the third floor to find the 300 pounder rifled Parrott gun that was hoisted aloft but never mounted.  Interestingly, it is on the northwest corner of the fort, with a great view towards the city of Portland as opposed to a southwest corner which would offer a better view out to sea...


Note rifling and beer cans.  This is one of those pictures that you take with a hand that is quickly removed from dark tube lest the beasties eat your fingers off.

Some scale.  I am a size 13 foot.  Note "U S" stamped on metal.  This is genuine US Military Grade weapons technology for the taking!
I spent some time wallowing in the sun and the nice water on Fort Gorges, and then I made a short leisurely sail back to my trailer.

On the way back, I got passed by the legendary "Free Candy go-for-it-this-guy-seems-legit Van" which we Capn Jon and I saw back during the Portland Boatbuilder Show this spring.  It was moored off Long Island that morning.

Fenders down and everything.
Until next time Intrepid Readers!  (exciting episode in the works for next week!)

 I love summer.